Oftentimes, I have been puzzled by Blender's apparent lack of capabilities regarding work planes (this is not entirely true—see Update at the bottom of the page). A work plane, as defined in other programs such as modo, lets us change alignment of the global XYZ axes momentarily in order to edit a mesh in a more comfortable way. In this post I am sharing my own workaround in Blender to align any object to any work plane, with one condition—the work plane needs to be represented by some mesh element. An example will make this more clear.
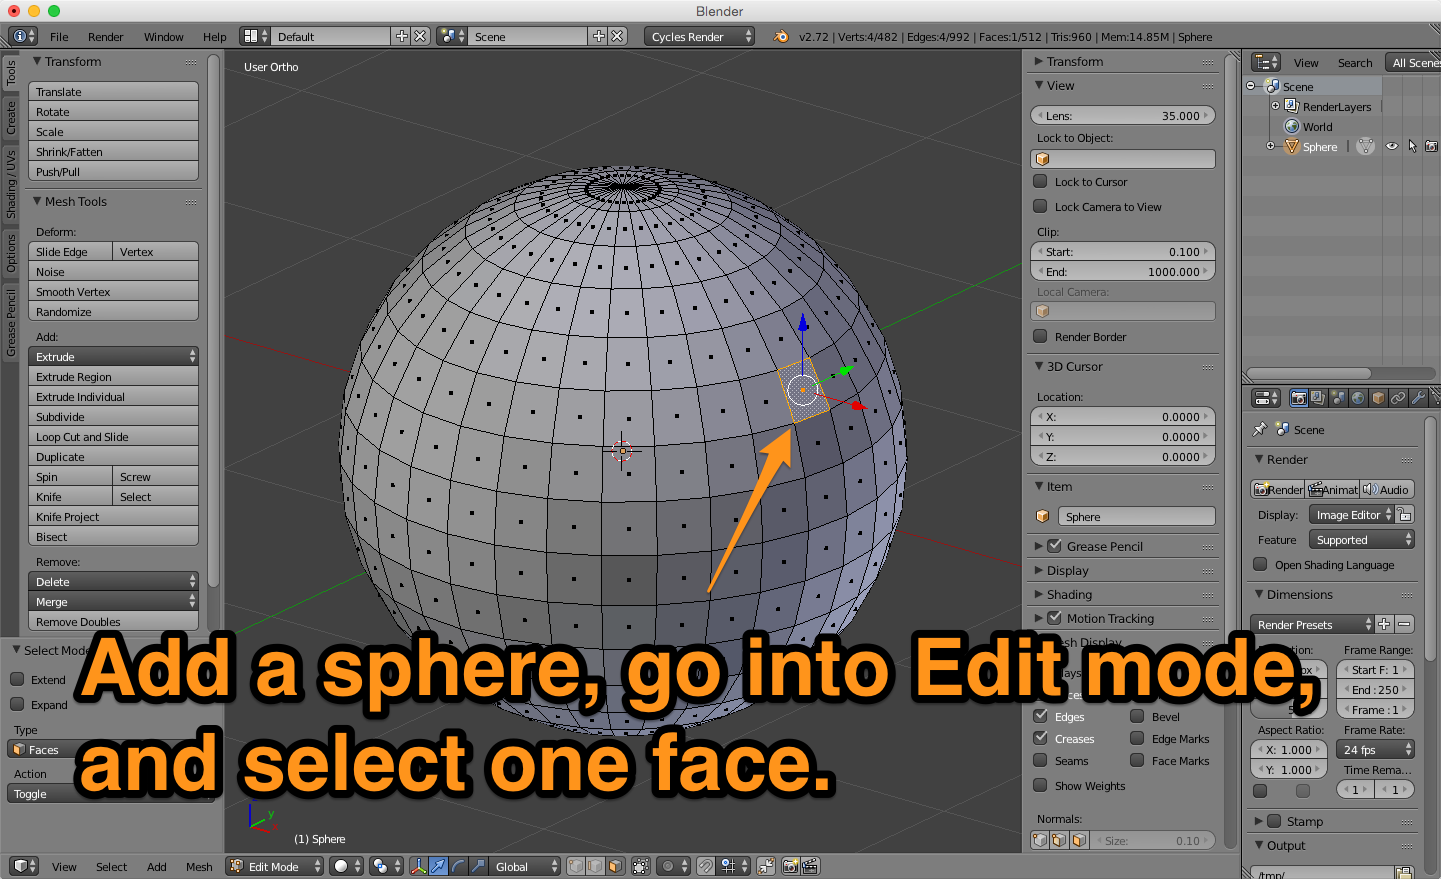
Open up a new Blender file and delete everything. Press 5 to go into Orthogonal view. Add a Sphere. Now, go into Edit mode, switch to Face mode, and select a random face (Figure 1). We will realign the whole sphere so this face ends up squarely aligned to the world axes.
 |
| Figure 1 |
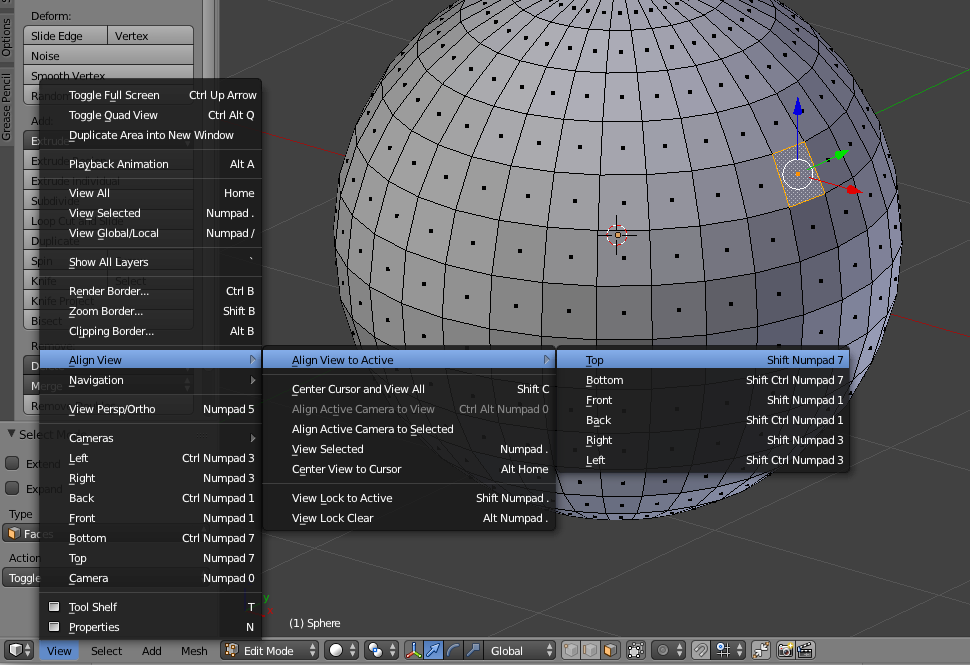
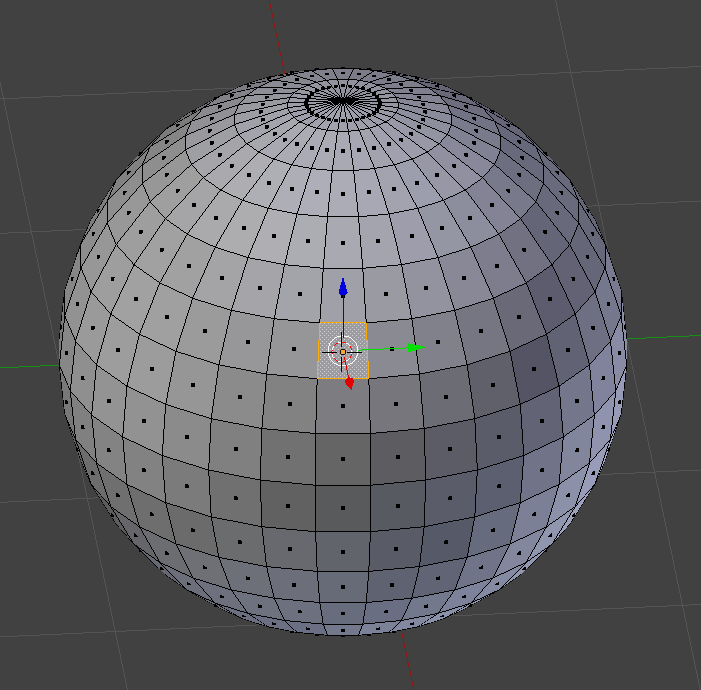
Blender has a set of view alignment commands that align the view to any selection within a mesh. The alignment can be to the top, bottom, front, back, right, and left of a selection (Figure 2). The keyboard shortcuts for these alignment commands are the same as the ones used for standard views, but with the Shift key added. So, if Numpad 7 is used to switch to top view, Shift-Numpad 7 is used to align the view to the top of a selection. Press Shift-Numpad 7 now to align the 3D Viewport to the top of the selected polygon (Figure 3). Press Shift-S and choose Cursor to Selected to place the 3D cursor on the selected face.
 |
| Figure 2 |
 |
| Figure 3 |
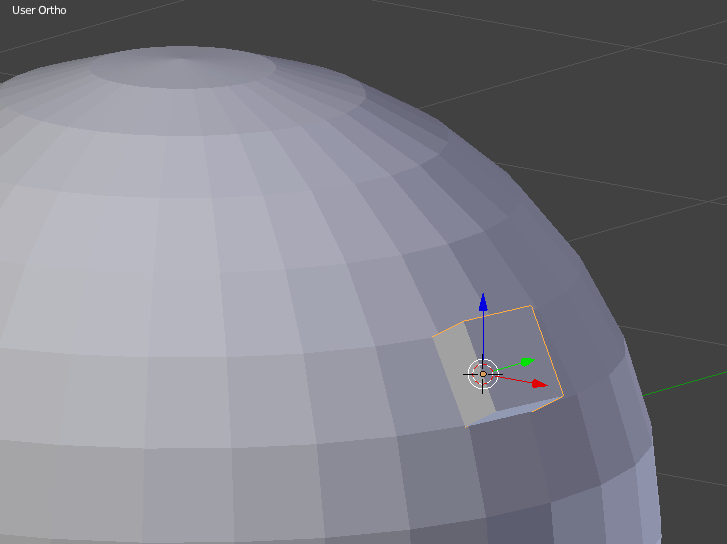
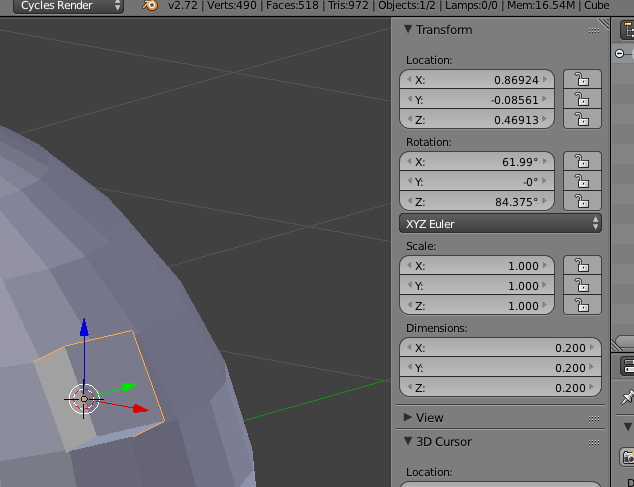
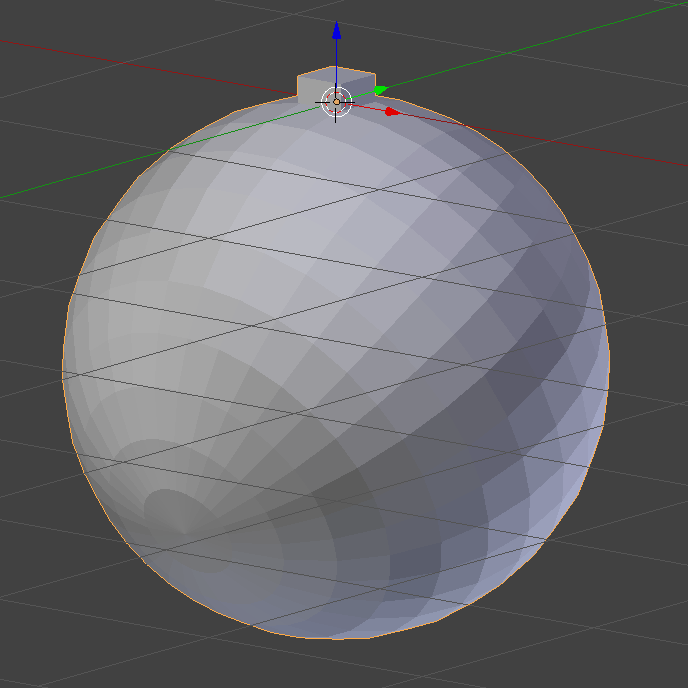
Press Tab to go into Object mode. Making sure not to change the 3D View, press Shift-A to add a Cube. In the Tool Shelf options for the newly created cube, enter 0.1 for Radius, and check the Align to View option (Figure 4). The cube is placed exactly in the precise location where the selected face sits. You can rotate the view to check this is so (Figure 5).
 |
| Figure 4 |
 |
| Figure 5 |
If you check the cube's Transform values in the Properties panel, you'll see it has the same location and rotation as the selected face (Figure 6).
 |
| Figure 6 |
Now, deselect everything. Select the sphere and then the cube. Press Control-J to join them into one mesh. The selection order is important, because we are joining the sphere to the cube, not the other way around. This way, we are preserving the cube's funky rotation and position. All you need to do now is press Option-G and Option-R to clear the object's rotation and location. The sphere-cum-cube is aligned perfectly so that the selected face is facing squarely up in the Z axis (Figure 7).
 |
| Figure 7 |
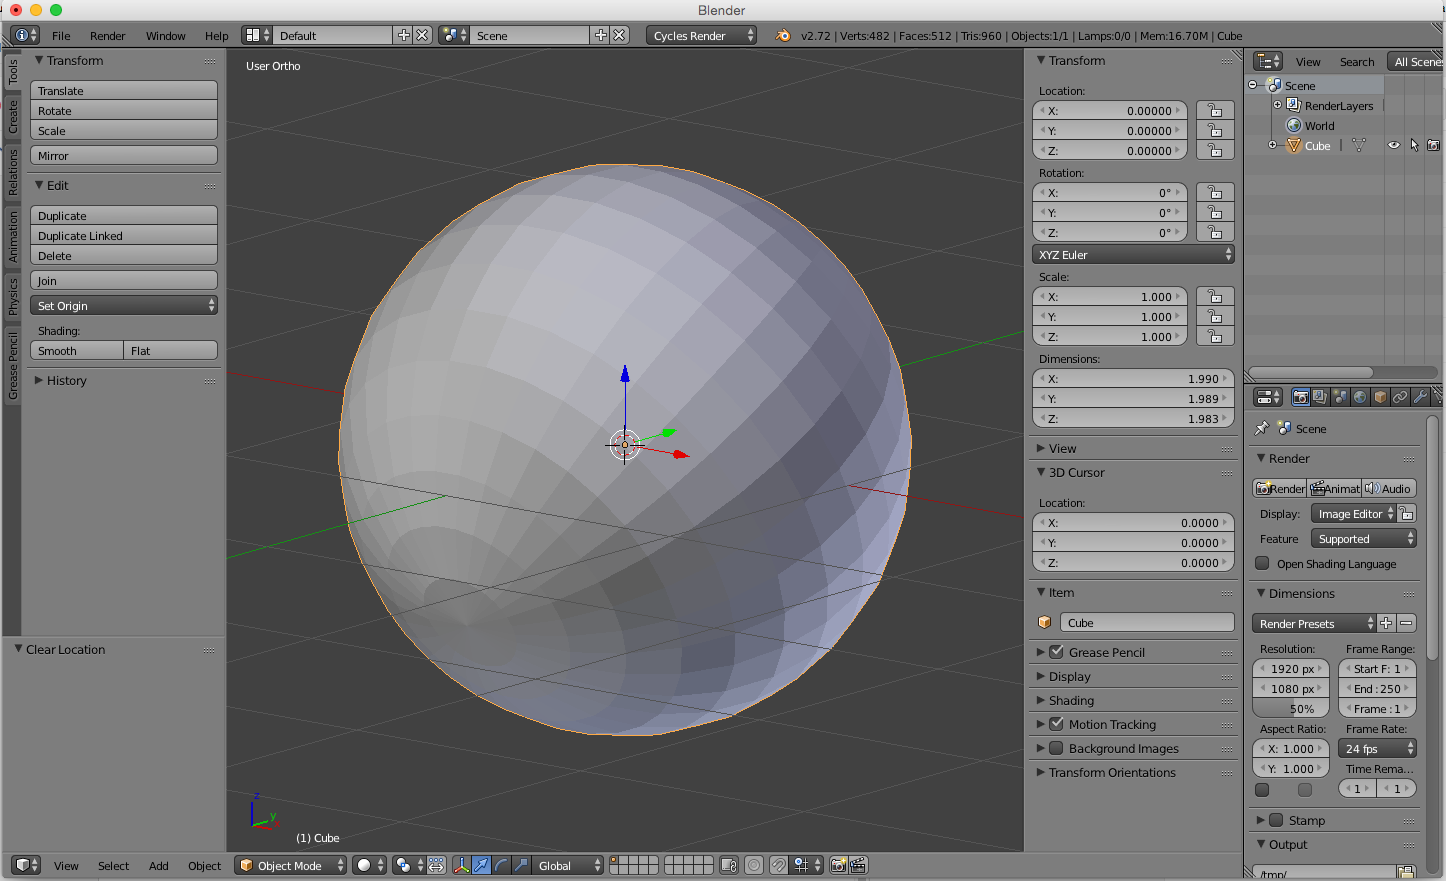
Finally, go into Edit mode, select the cube, and delete it. Go back into Object mode, press Shift-Control-Option-C, choose Origin to Center of Mass, and press Option-G again to clear its position and place it on the world origin (Figure 8). We are done!
 |
| Figure 8 |
Update: Right after I published this post, Eriandor left a comment with a link on creating custom transform orientations. I did not know, or remember, this feature existed. I think now custom transform orientations might offer a better, less cumbersome workflow in many cases. Thanks Eriandor! Here is the
link.

Or you could press Ctrl+ Alt + Space to create a custom Transform Orientation.
ReplyDeletehttp://wiki.blender.org/index.php/Doc:2.6/Manual/3D_interaction/Transform_Control/Transform_Orientations
Thanks! I did not know that. That is super-useful.
ReplyDeleteI knew about transform orientations, but not the shft-7 hotkey.
ReplyDeleteIn previous Blender version the hotkey was, iirc *, but that no longer works.
Thanks for pointing out how to get that functionality!
You are welcome! Glad I could help :)
ReplyDelete