

Tuesday, May 31, 2011
Subway Scene 5
Here is a quick update for the scene. I tried to get everything down to a realistic scale. That's why I added some human figures for comparison. The station might be a tad too tall, I'm not sure—is 8 meters too high? Frankly, I have no idea what the real proportions should be. I think I measured a real subway station at over 100 meters. Anyway, as long as everything look s reasonable, it should be OK. I added a bit more detail. Just a little more modeling left and I'll be done with that part of the project—I think :)

Monday, May 30, 2011
Subway Scene 4
Here is a render showing the progress I've been making on this piece. I've added some more details—like the trash cans, the billboards, and the rail bases. I decided to add the area lights by hand, that is, duplicating them one at a time. I also linked their data (Control-L) so that whatever change is effected on one of them will be shared by them all. I'm going to add some detail to the tunnel, some cables, a bit more of modeling inside the station, and I'll be ready to texture.


Thursday, May 26, 2011
Freaking Awesome Short Movie
You must see this! It's an incredible short animated movie put together by a few guys. The job they did is spectacular, and to me, it represents what 3D should be aspiring to. Namely: not just photo-realism, but over-realism. That is: 3D has the ability to depict things that can't be depicted any other way. For instace, notice how the innards of the bug are shown as the venom goes in its body. No imaging technology can achieve that—at least not easily. 3D gives us here a look at a secret space inaccessible by any the mean, except perhaps imagination.
Subway Scene 3
Here si an update to my Subway Scene. The station is really beginning to take shape, although there are still many elements missing. This is perhaps the hardest part for me: deciding the shape of things and the general feel. Once I'm all done, I'll start breaking things :)


Wednesday, May 25, 2011
New Blog Title Design
I know, it's not the most exciting topic, but it's better than nothing :)
I've been thinking I'd like to come up with a spiffy lettering for the title of this blog. I've tried different things so far, but I'm not quite happy yet. What you see today is where I'm at: a kind of plasticky, GI, red, boldface look. The beach ball is related to the weather where I am now, Barcelona :)
I'm including a couple more designs I tried before. They both got voted down at home for being too spammy :D What do you think?
 |
| Version 1 |
 |
| Version 2 |
Tuesday, May 24, 2011
Getting Rid of the Grid in Cheetah3D
With the new 5.7 release of Cheetah3D, a long-time wish of mine has become a reality. You see, I hate the grid. Every time you open up a new document, the Grid option in the Style pop-up menu in the 3D view panel is reset to its default position—on (Figure 1). This is one of those "features" that can really kill the deal for me. If every time I start a new file I need to go and uncheck that option, pretty soon it's going to get very annoying. Even in the newest Cheetah3D version, this option is not saved in the preferences file. What's more, one can't really assign a keyboard shortcut to it either—I just double-checked this.
The way to get rid of the Grid for good is to change its color in the Preferences panel. Hit Command-Colon to access the Preferences panel. Click on the Colors tab. We will modify the color for the "3D View Grid (Big Step)" and "3D View Grid (Small Step)" options. Double-click on the color button next to "3D View Grid (Big Step)" (Figure 2.)
In the Mac-standard Colors dialog that shows up, drag the Opacity slider all the way to 0. This tells the program to turn that color to completely transparent (Figure 3.) Do the same for 3D View Grid (Small Step.)
When you go back to the 3D view, the grid won't be there anymore, even though the Grid option in the Style pop-up menu is on. The only thing that's left are the red and blue lines indicating the X and Z axis. These are part of the grid, but they, as far as I know, they can't be turned off.
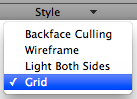 |
| Figure 1. The Style pop-up menu, where the Grid option is on by default. |
 |
| figure 2. Double click on the dark-colored button thingy next to 3D View Grid (Big Step). |
In the Mac-standard Colors dialog that shows up, drag the Opacity slider all the way to 0. This tells the program to turn that color to completely transparent (Figure 3.) Do the same for 3D View Grid (Small Step.)
 |
| Figure 3. The Opacity slider has been turned down to 0. |
Cheetah3D 5.7 Released
Today Cheetah3D 5.7 was finally released. Out of the beta stage, this release mainly improves some UI features. I think that the most important one is the possibility to assign a custom keyboard shortcut to all the functions in the program. In the past, this feature was limited to most (but not all) menu items. Now it has been greatly expanded, to the point where you can assign keyboard shortcuts to things like scripts and parametric objects—imagine pressing Control-C to create a cube :)
Also in the Preferences panel, many of the colors in the application can be customized. For instance, you can change the color of the background, or the color of the selected objects.
Additionally, Collada support has been improved, with the addition of animation support, among others.
It's great to see some of the UI aspects of the program being improved. I am a firm believer that, more than fancy features, what makes a program successful is a solid UI foundation. If you're a Cheetah3D user, let me know what you think of the new version.
Here's the link to Cheetah3D's download page.
Friday, May 20, 2011
Importing Multiple Images for Background in Blender
A few weeks ago, Andrew Price showed how to import multiple images at once using the Import Images as Planes addon in Blender 2.57. Today I came up with a way to use this feature to save me some time when using images as background.
I started working again on my subway scene, this time using reference pictures I took. I decided to activate the Background Images feature in Blender, so I could see these reference images right on my file. To access this feature, just press N (which brings up the Properties panel,) click on Background Images, then on Add Image, expand by clicking on Not Set, and click Open, browse to the desired file, and click Open Image.
Now, imagine having to do that ten, twenty times. It gets boring quickly. What I did was use the Import Images as Planes addon. To use it, you must have it activated already—Andrew Price explains how to do this in his tutorial. Once it's activated, call it up by pressing Space and type 'import images' (Figure 1.)
Next, in the dialog that shows up, browse to the folder where you have the pictures you want to add. I used the settings shown in Figure 2.
The images get imported, all in a row, like shown in Figure 3. Press X to delete them all.
When you go back to Background Images, now the drop-down menu allows you to use any of the image textures you just added (Figure 4). This is also useful across all the functions in the Blender that use textures. Your imported textures will be available to be used.
I started working again on my subway scene, this time using reference pictures I took. I decided to activate the Background Images feature in Blender, so I could see these reference images right on my file. To access this feature, just press N (which brings up the Properties panel,) click on Background Images, then on Add Image, expand by clicking on Not Set, and click Open, browse to the desired file, and click Open Image.
Now, imagine having to do that ten, twenty times. It gets boring quickly. What I did was use the Import Images as Planes addon. To use it, you must have it activated already—Andrew Price explains how to do this in his tutorial. Once it's activated, call it up by pressing Space and type 'import images' (Figure 1.)
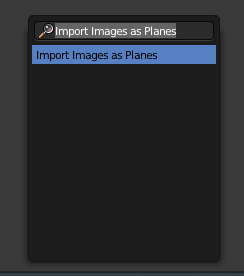 |
| Figure 1. Just type 'import images.' No need to type the whole thing. |
 |
| Figure 2. These are the options I used when importing the images as planes. |
 |
| Figure 3 |
 |
| Figure 4 |
Thursday, May 19, 2011
Fire! (Blenderguru's Flamethrower Tutorial)
Hi again, I just finished Andre Price's tutorial on creating fire in Blender. What an awesome tutorial it is too! I highly recommend it to all those who would like to add a bit of fire effects in their scene. Before doing this tutorial, I think it helps if you know a bit about particle systems in Blender beforehand. Also, it would not hurt knowing a bit about Compositing Nodes, since Andrew rushes a bit through that part, although admittedly the Node setup used in this tutorial is very simple.
The main part of the tutorial consists of setting up smoke in Blender—fire is basically smoke with a rendered with a volumetric material that changes color according to density. The basic object for creating smoke/fire is a "domain," which is an object, like a cube, that restricts the smoke simulation to a specific part of the scene.
I did not render the whole animation, just a frame. I could've gone for a higher resolution smoke, but my computer is not extremely fast, and baking the smoke takes a while—about one hour for 120 frames, or 5 seconds of animation. Here is the result.
 |
| Pretty scary flame, eh? :D |
Tuesday, May 17, 2011
My First Cinema4D Render
Lately I've been trying out Cinema4D. I think it is clear that Cinema4D has had a direct influence over the development of Cheetah3D, a program I know well. From the way C4D behaves and feels—like certain conventions and the use of Tags and Modifiers, whatever they are called in C4D—everything just rings a bell, like I am in familiar territory. The thing I've been doing first (after finding how to create objects) is trying out C4D's materials and global illumination. I have to say I am not disappointed at all, I think I'm going to have to try and dig deeper into this incredible program. In the meantime, here is my first render with it—inspired mostly on this tutorial I found in tutorialhero.com. There's a lot of room for improvement in the final render. As usual, the key to improving the image seems to be the lighting setup :) I added a bit of noise and a Bloom filter in Pixelmator. The noise was needed due to some banding in the gray blends on the background.
 |
| First render with Cinema4D. |
Creating a Biconvex Lens in Cheetah3D
I just found this old tutorial of mine about how to create a biconvex lens in Cheetah3D. I would change a couple of things, mainly using the Bridge tool on step 3. Enjoy!
 |
| Mini-tutorial about creating a biconvex lens. |
Subway Scene 2
Here is an update to the post-apocalyptic subway scene I've been working on. I started using some references pictures of the subway in Barcelona. Next up, it's going to be modeling the rails, the electricity rail near the top of the tunnel, and other elements.
 |
| I'm basing the subway station roughly on something like this. |
 |
| I'm using a couple of arrays of area lights, setup as Dupliverts follwing a straight path. I've done a bit of tone adjusting and sharpening with the compositing nodes in Blender. |
Thursday, May 12, 2011
Subway Scene
There's a new idea I've been thinking about recently. It is a scene of a post-apocalyptic subway station, all broken-up and showing signs of, well, post-apocalyptic chaos. This is the very beginning of the project. For the station, I've been taking mental notes from this subway station near home. Some day I'll go and actually take pictures of it, for the details and proportions. Since it's going to end up all destroyed, it's mostly for reference. I'm going to to post progress renders on this blog as well as on blenderartists. Here is the first pic:
 |
| Very basic render with just Ambient Occlusion. The dimensions of the station are roughly 12 meters wide by 100 meters long. I'll adjust the this size once I get more realistic figures. By the way, the 100 m long figure comes from me actually walking the whole station :) |
Friday, May 6, 2011
Neon lights in Blender 2.57
This is the result of today's experiments with emission, curves, and indirect illumination in Blender 2.57. I did a bit of compositing with compositing nodes. Just a test.
 |
| I think it has a certain yin and yang quality to it... |
Thursday, May 5, 2011
Texture Overlay in Cheetah3D
The goal of this tutorial is to introduce some of the basic features of Cheetah3D's node system. In particular, I'm interested in demonstrating a way to add decals on top of existing textures. To my knowledge, this is the easiest way to do it. I've included links for the images I've used at the bottom of the tutorial. I've left them all intact, except for TrafficSigns0324_2_S.png, which I've opened in Photoshop, flattened it, and used the white eyedropper in the Levels dialog box to force the background into white. The reason for this is that compositing textures does not quite work the expected way when there's transparency involved.
Open a new C3D file, add a plane and a Sun Light. Set the camera and Sun Light options according to figures 1 and 2. The plane can be left in its default settings.
Create a new material, drag it over the plane to apply it to the plane. In the Material Properties panel, turn specularity all the way down—that is, black (Figure 3).
With the newly created material selected, click on the Nodes tab to access the material nodes. You will see a single node, called "Material." Add six new nodes. You can Control-click on the blue-gray background in the Nodes window to access the Add Nodes pop-up menu. Add three Image nodes, two Multiply nodes (Math→Multiply,) and a Gradient node. Place them in the positions shown in Figure 4. Click on each of the three Image nodes and load a texture in each of them. Use the settings shown in figures 5 to 7.
Hit Command-R to render the scene. You're done. Please feel free to experiment, and if you get any interesting results or suggestions, make sure to pass them on.

Open a new C3D file, add a plane and a Sun Light. Set the camera and Sun Light options according to figures 1 and 2. The plane can be left in its default settings.
 |
| Figure 1. Set the camera's output size to 480x480 pixels. Turn off the camera light. Set the camera position to 1 unit in the Y (vertical) axis. Set its rotation to 90º as shown. |
 |
| Figure 2. Change the samples to 1. Leave the other options in their default values. |
Create a new material, drag it over the plane to apply it to the plane. In the Material Properties panel, turn specularity all the way down—that is, black (Figure 3).
 |
| Figure 3. Set the material's specular to black (= 0). |
With the newly created material selected, click on the Nodes tab to access the material nodes. You will see a single node, called "Material." Add six new nodes. You can Control-click on the blue-gray background in the Nodes window to access the Add Nodes pop-up menu. Add three Image nodes, two Multiply nodes (Math→Multiply,) and a Gradient node. Place them in the positions shown in Figure 4. Click on each of the three Image nodes and load a texture in each of them. Use the settings shown in figures 5 to 7.
 |
| Figure 4. These are all the nodes we'll be using for in this tutorial. |
 |
| Figure 5. Notice the scale and the fact that the image is tiled. Set the Mix color and Background color to white. |
 |
| Figure 6. Notice the Position and Scale settings. Again, make sure that Mix color and Background color are set to white. |
 |
| Figure 7. Change the scale to 0.5 and change the Mix and Background color to white. |
Connect the Color output slot on the wood plank texture into one of the Multiply nodes' A input slot. Connect the Leaking texture's Color output slot into the Gradient's Position input slot. Click on the Gradient texture and change its setting to those shown in Figure 8. Connect the Color output slot on the Gradient node into the B input slot on the Multiply node. As you can see on figure 10, the Multiply node shown here does not have a preview. In order to get a preview of the result, click on the little circle next to the Color output in the Multiply node (Figure 9.) After all this, you should have something like in Figure 10.
 | ||
| Figure 8. Move the white slider to the left. This forces the midtones and light colors of the texture into a white.
|

 |
| Figure 10. Half of the texture is setup. |
Connect the red sign texture's Color output into the B slot of the second Multiply node. Connect the Vector output of this Multiply node into the Diffuse slot of the Material node. Connect the wood plank texture node's Value output into the Bumpmap slot on the Material node. You should have something similar to Figure 11.
 |
| Figure 11. |
These are the textures I used. They come from CGTextures.
Wednesday, May 4, 2011
Underground Subway Scene tutorial result
Alright, this is my newest image, created by following Andrew Price's great Underground Subway Scene tutorial. I really enjoy using the compositing nodes in Blender. Before I knew how to use Blender's compositing nodes, I used to think that they were a poor substitute of Photoshop. However, compositing nodes are much more than an image manipulating tool. For example, you can actually input the depth information (Z-buffer in 3D parlance) of a scene and alter the pixels according to that—imagine an alpha channel in 3D! Anyway, Andrew's tutorial relies heavily, as usual, in the compositing nodes to bring up and image and really give it the extra kick to stand out.
Somehow related to this, I've been thinking lately that I'd be nice to create a scene of a post-apocalyptic subway station. I'll keep you posted if I started, and include some progress posts.
Here's my final result. I'm not 100% happy with it. However, I consider it more of an exercise, a study if you will, not so much a "real" project. This reminds me of something my music teacher told me once about Bach's suites for cello and Pau Casals. Apparently, before Pau Casals popularized them, they used to be regarded just as studies for the cello. So, he studied them thouroughly, and began to play them in concerts. Eventually they became to be recognized for what they truly are: works of art. Anyway, what's the difference between a study and a work of art?
 |
| I have no idea what that 608 stands for... |
Tuesday, May 3, 2011
Great Blender Tips (from Blender Guru)
Just a short blog entry today. I just read about these Blender tips on Blende Guru. I knew most of them already. Some don't seem to work on 2.57—like Control-V for scaling a plane to fit a loaded texture. Some are impossible working on a laptop without numberpad—I use the regular number keys as numberpad keys. Some of these tips are just pure genius!
Monday, May 2, 2011
Blender Guru's tutorials
It's been a while since I've posted anything in my 3D blog. Unfortunately, I haven't been able to do a lot of 3D these last few weeks. So I decided to get myself going again, this time by doing a couple of tutorials by Andrew Price, the guy behind Blender Guru. For those who don't know anything about his site, let me just say that it is absolutely fabulous. It is full of inspirational tutorials, great tips and interesting facts, not just about Blender, but about 3D in general. The guy even started a series called Focused Critique, where he analyzes works sent to him by 3D artists, and gives tips about how to improve them. I don't know Andrew personally, but just from listening to his tutorials, I really enjoy his style, and his Australian accent is a blast!
Anyway, I did his Outdoor Lighting Tutorial, and here's the result.
Anyway, I did his Outdoor Lighting Tutorial, and here's the result.
 |
| All done in Blender 2.57, which is getting nicer and nicer with every update. I hope they can improve the renderer, that would just about give me the perfect excuse not to have to switch to any other program ever again! :) |
Subscribe to:
Posts (Atom)